
Building the Body Before the Fabric
Clothing follows the shape underneath. If the shoulders and neck are wrong, no pleat will save the outfit. Use as a starting point the guidelines from our Dessin manga homme guide: shoulders about two head widths wide, a neck about half the width of the head. The collar and sleeves attach to these measurements.
For a female character, the shoulders are narrower and the neck thinner, as explained in Dessin manga fille. Always sketch the body in simple volumes, then dress it. The method is in comment dessiner un corps manga.
Placing Folds at the Joints
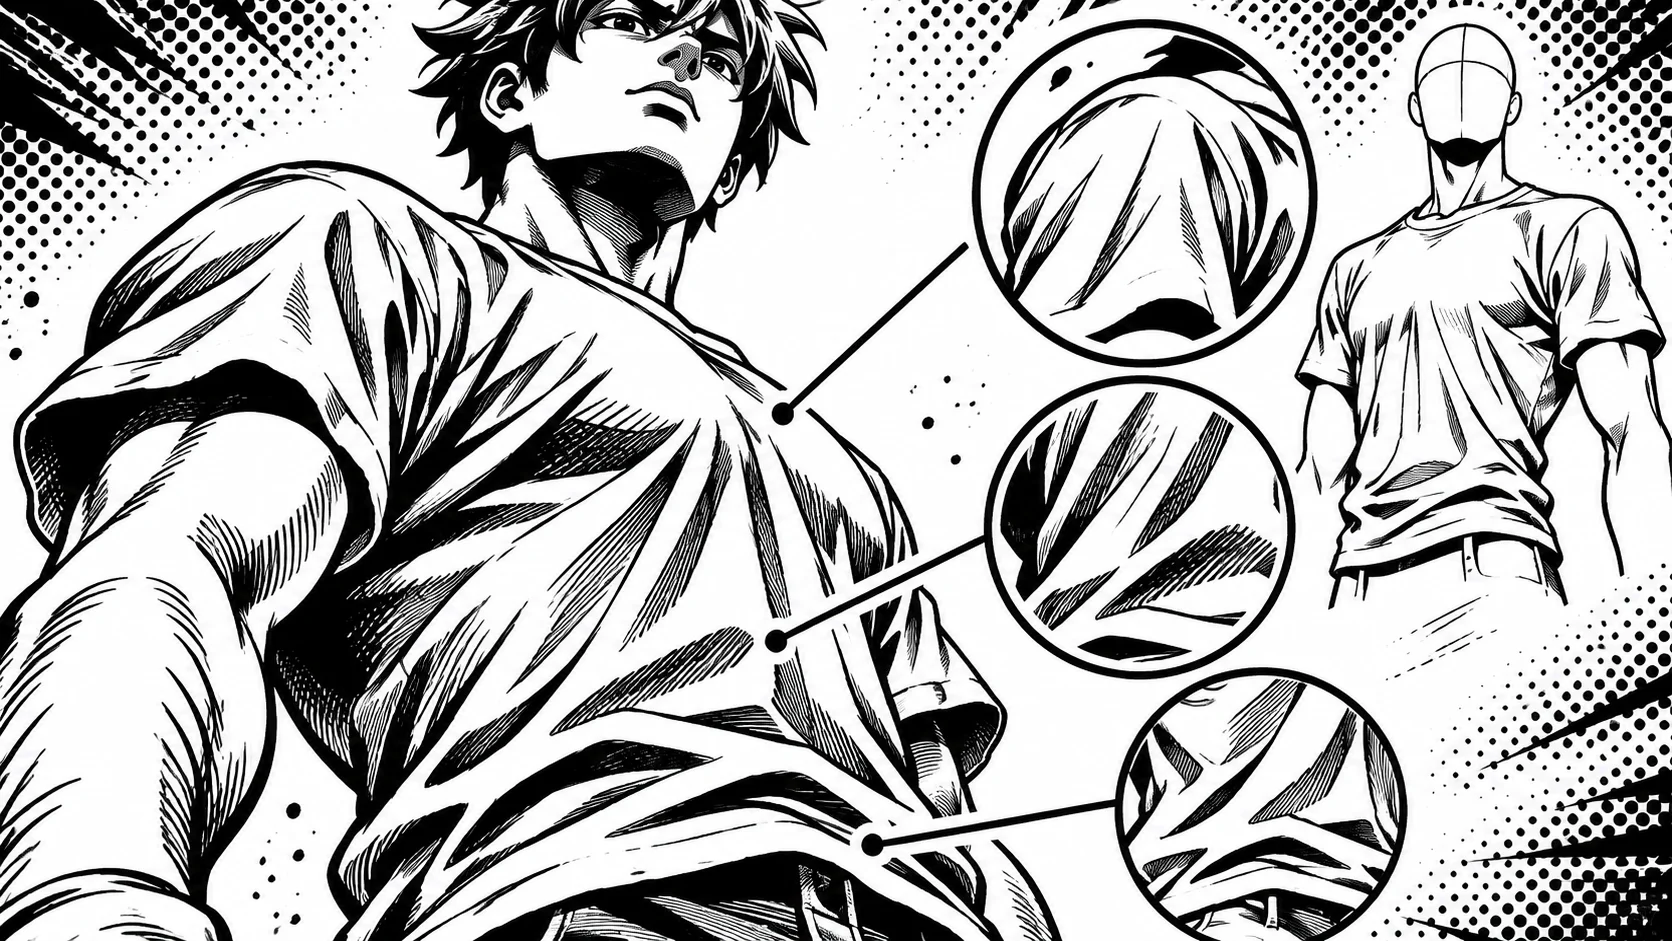
Fabric folds where the body bends. Three areas concentrate almost all the useful folds:
- the crook of the elbow and the shoulder, when the arm is raised;
- the waist, when the torso leans or twists;
- the knee and the groin, when the leg steps forward.
Elsewhere, leave the fabric smooth. A straight arm has almost no folds, a bent arm has many at the elbow. Revisit the volumes of the bras manga and the jambe manga: the fold originates at the joint between two cylinders.
Reading Tension: Stretched Folds, Drooping Folds
Two families of folds are enough. Tension folds start from a pressure point (the hip, the shoulder, the knee) and radiate in a star shape toward the loose fabric. Drop folds fall straight down under the effect of weight, on a skirt, an open jacket, or a wide sleeve.
If the character leans on one leg, the pose described in the article posture manga can also be read in the fabric: the folds converge toward the hip bearing the weight.
Simplify: few lines, well chosen
Manga thrives on readability. A small panel cannot support twenty folds. Aim for three to five lines per pressure zone, of different lengths, with a slightly bolder stroke on the shadow side.
- Vary the length: folds that are all identical look mechanical.
- End a fold in a point or let it fade out, do not close it in a loop.
- Reserve tight folds for thin fabrics, and large, wide folds for thick fabrics like a coat or a uniform.
Materials matter too: a pencil that allows for a fine then bold stroke helps a lot, see the minimal starter kit.
Keeping the same costume from one panel to the next
A character's costume is an element of identity. Buttons, collars, stripes, and sleeve folds must remain the same when the angle changes. Note three fixed landmarks (collar position, number of buttons, sleeve length) and check them on every page. A tool like Bulle helps structure entire pages without losing these details.
Conclusion
Dressing a manga character comes down to drawing the body underneath, then adding folds only where it bends: shoulder, waist, knee. Choose between tension folds and draping folds, limit yourself to a few lines per zone, and note the fixed details of the costume. Try it on the same pose, first naked in volumes, then dressed.