Constructing the arm with two cylinders and a sphere
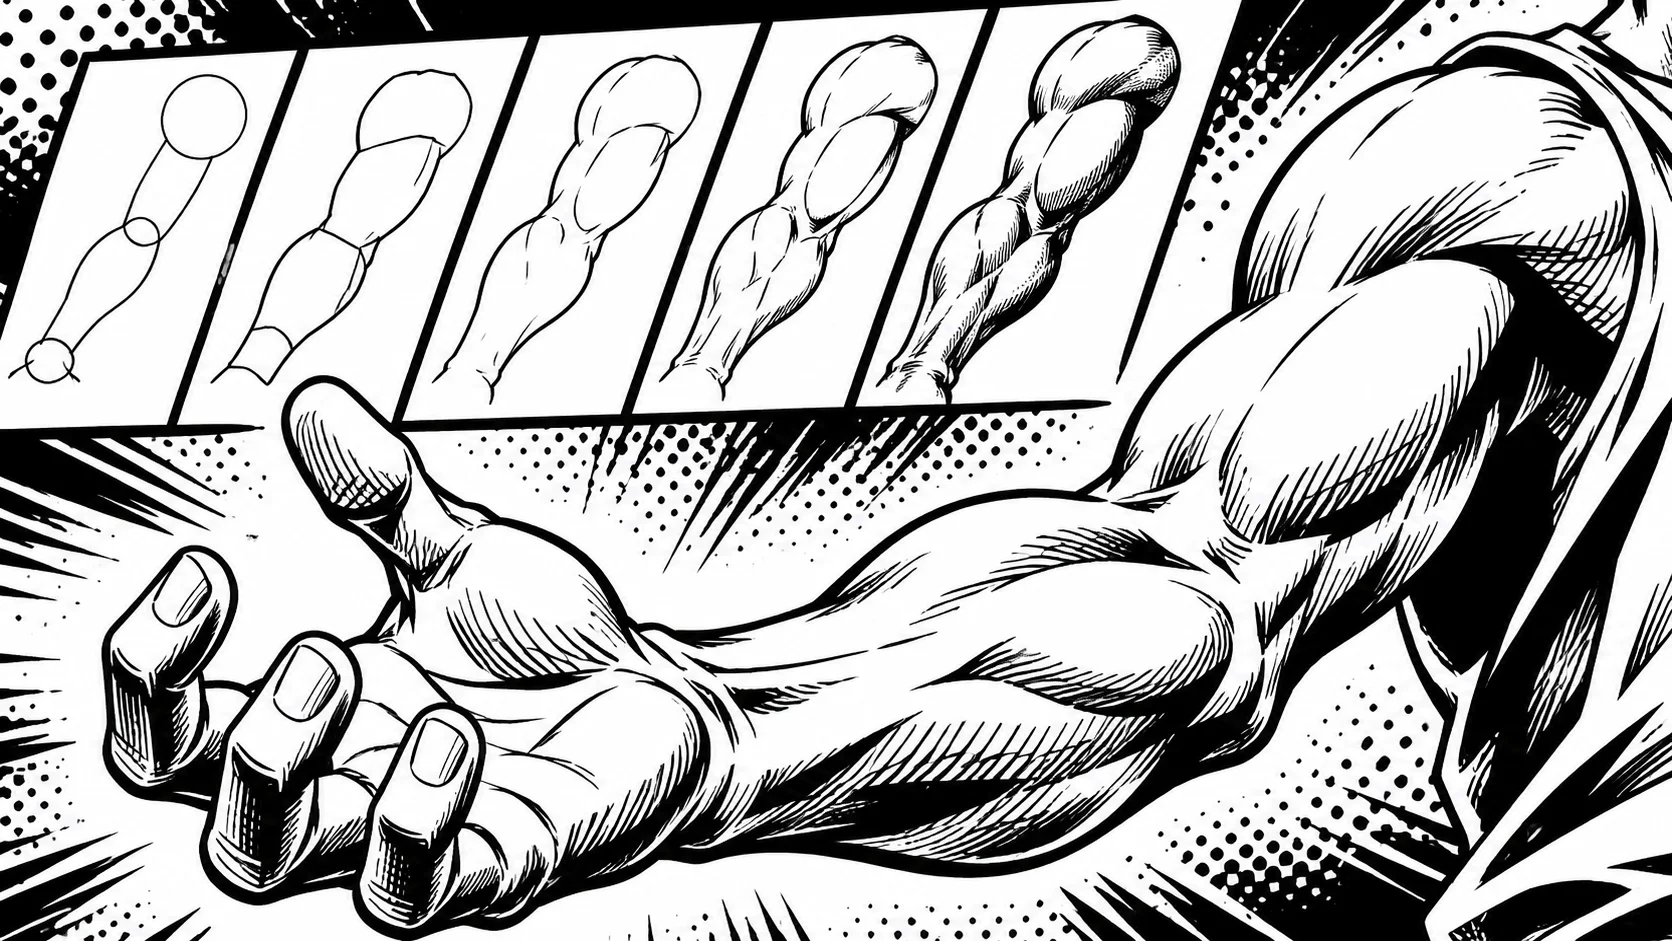
Forget the contour. An arm is built with two cylinders, the forearm and the upper arm, separated by a small sphere: the elbow.
This rule comes from the full-body method: arms and legs are built in two cylinders each, with a sphere at the joint. To review the complete method, read our manga body guide.
The upper cylinder is a bit thicker than the lower one, which tapers toward the wrist. Do not draw the muscles yet.
Positioning the shoulder, elbow, and wrist
Landmarks are measured on the body. The elbow is positioned at the waist level, no higher. The hand reaches down to the middle of the thigh when the arm is relaxed.
Many characters have arms that are too short because the artist stops the arm at the hip.
- The shoulder: a sphere placed on the side of the thorax, not on the neck line.
- The elbow: at the waist level.
- The hand: down to the middle of the thigh.
Bending the arm without breaking it
When the arm bends, the two cylinders keep their length. Only the angle changes. The elbow points backward, the forearm moves up.
If you shorten the forearm to show the bend, you get a doll's arm. Use perspective instead: the part getting closer to the reader appears wider.
For a raised arm, the shoulder goes up with it. This movement is detailed in the article on manga shoulders.
Bringing life with a line of action
A manga arm comes alive through a curve, not through muscles. First draw a flexible line from the shoulder to the wrist, then place the cylinders along this line.
For relief, three strokes are enough: the deltoid, the biceps, the curve of the forearm. In manga, you suggest. To match the arm with the rest of the body, refer back to the manga posture guide.
Mistakes that break a manga arm
Four mistakes happen almost every time.
- An arm that stops at the hip: it is too short.
- An identical thickness everywhere: the arm becomes a pipe.
- An elbow too high: the forearm becomes longer than the upper arm.
- Two parallel arms: the pose is that of a mannequin.
Fill the arm in black: if the gesture remains readable, the construction is good. Across a series of panels, the arm must keep the same length from one panel to the next; a tool like Bulle.ai helps maintain stable proportions.
Conclusion
A manga arm is constructed with two cylinders and a sphere, with the elbow at the waist and the hand at mid-thigh. Add an action line, three relief strokes, and check the silhouette. To finish the gesture, move on to the manga hand.